


Using a Tissue-Culture Pot: Setup, Moisture and Dome Ventilation
TL;DR
Use the growing pot to manage root moisture and the dome to manage humidity around the leaves. Check each separately. Start with pre-moistened airy medium, keep the crown above it and open the dome gradually when the plant remains firm. This guide focuses on using the equipment after deflasking, rather than repeating the entire acclimation process.
What each part does
Fresh tissue-culture plants are moving from controlled laboratory conditions into a less protected environment. Their ability to manage water loss is still adjusting, so the first setup should make that transition gentle and easy to observe. [1]
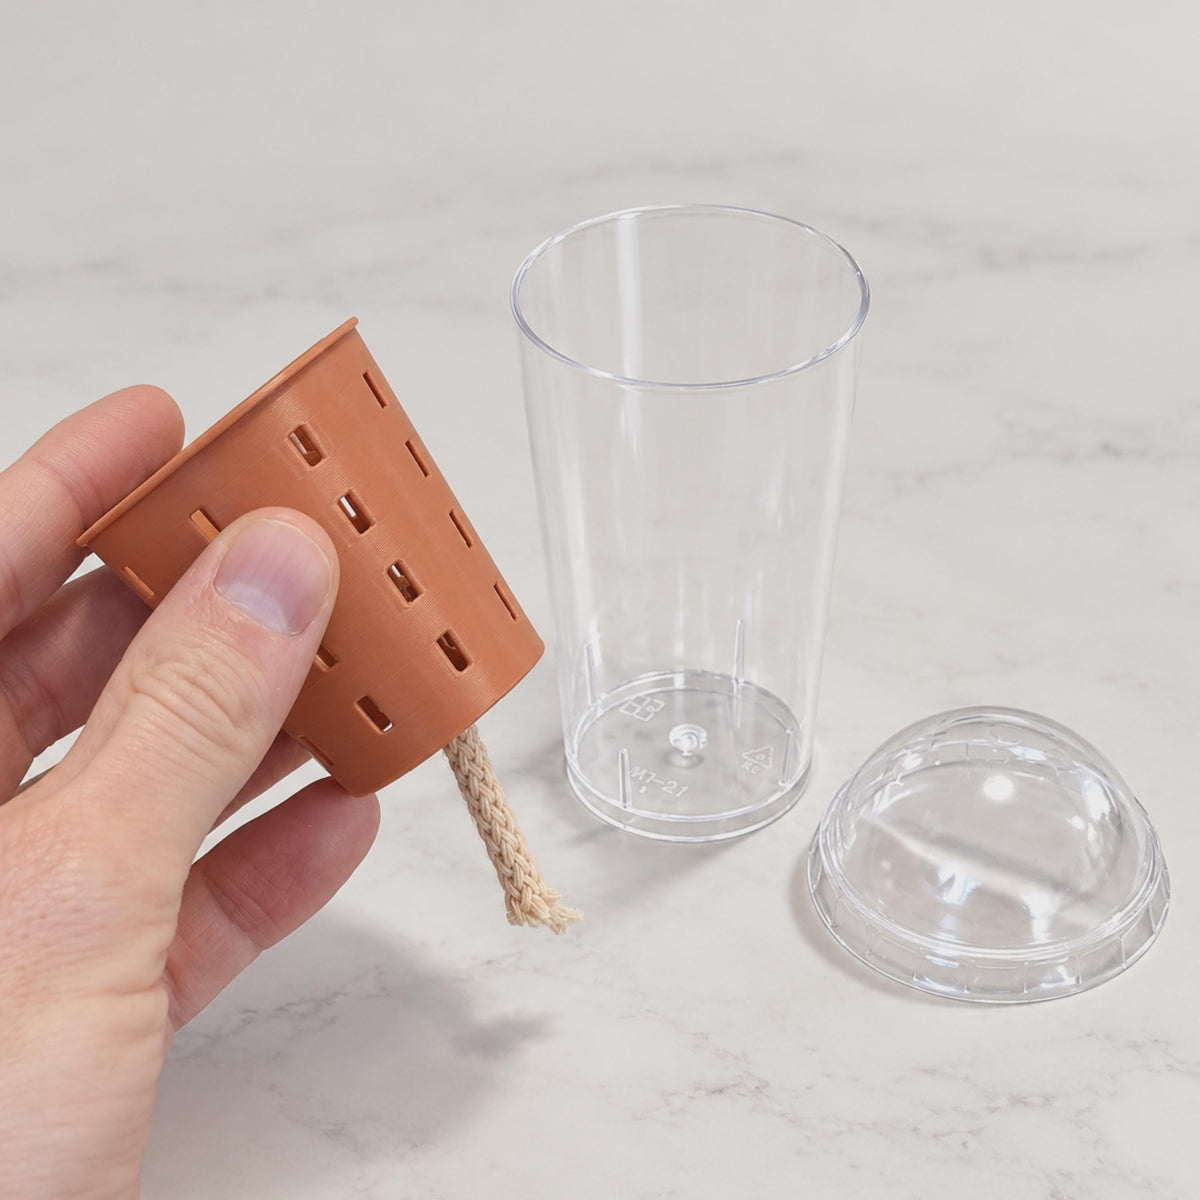
- The inner growing pot holds the roots and medium. Its size and the medium's structure help determine how moisture behaves.
- The clear dome shelters the leaves from sudden exposure to drier air. Its vents let you increase air exchange gradually.
- The outer cover gives the setup a coordinated finish and shades the clear pot walls.
- A wick and reservoir, where included in your particular setup, connect a water supply to the medium. Check those parts independently of the dome.
For my tissue-culture acclimation pot, choose cover only if you already have the compatible components, or the complete set for the cover, clear inner pot and adjustable dome. Check the selected option rather than assuming every covered pot includes a wick. [4]
Choose the medium
Match particle size to the roots. Tiny plantlets need gentle contact with moist medium; huge orchid-bark chunks alone can leave their roots hanging in gaps. A suitable propagation mix with fine horticultural perlite is one option. A mineral medium can also work if its texture and moisture movement suit the setup.
Moisture and air spaces both matter. Perlite helps create lasting air spaces, while coir or peat-based components retain water. Pre-moisten the mix and settle it gently, rather than pressing it into a dense plug. [3]
Choose a growing pot that comfortably accommodates the current roots. If the plantlet is exceptionally small, do not automatically fill a much larger pot with unused wet medium. Check the usable growing space, not the outer cover's decorative height.
Is your medium new to you? Test it in an empty pot first. Wet it, let excess water drain and see how it feels. Learning with a spare cup is less stressful than learning with your rarest plant.
Assemble the setup
- Clean before planting. Wash reusable parts, rinse thoroughly and prepare the fresh medium. Keep the plant supported while working.
- Position the plant. Place roots naturally into a small hole, settle the medium around them and keep the crown above the surface.
- Check the water arrangement. In a draining inner pot inside a cover, let excess water drain and empty collected runoff. In a purpose-designed reservoir setup, follow its waterline and assembly instructions.
- If using a wick, check the connection. Wet it first and ensure it reaches the reservoir and contacts the medium. Check that the root zone actually becomes moist.
- Fit the dome. Leave room above the leaves and make sure you can reach its adjustable vents without twisting the plant.
Do not borrow the signature planter's filling mark for a different propagation cup. A removable cover around a nursery pot and a reservoir built for wick watering need different water arrangements.
Your daily check
A brief look once daily is a useful starting routine. Inspect through the clear parts where possible, so you do not keep disturbing the plant.
- Leaves: upright and firm, or drooping after a vent change?
- Base: firm, or developing soft, translucent tissue?
- Medium: moist around the roots, dry, or visibly saturated?
- Water: appropriate for the setup, or accumulated against the pot base or crown?
- Dome: clear of the leaves, with vents accessible and debris removed?
Condensation is a clue about the enclosure, not a refill signal. Before adding water, check the medium itself. If there is already plenty of moisture, more water is not the answer to wilting caused by a sudden humidity change.
Keep the setup in gentle indirect light and stable warmth. Around 22–26°C (72–79°F) is a practical starting range for many young tropical aroids, subject to the supplier's species-specific advice. Check the temperature near the plant. A covered pot in direct sun can heat far more than the room around it.
Adjusting the dome
A humidity cover helps protect newly transplanted plantlets from drying while functional roots develop. [2] The next goal is to help the plant manage the humidity of its eventual growing space.
- Start with a small vent opening once the plant is stable. Watch its response without changing the light or repotting at the same time.
- Hold the setting while leaves stay firm. If it remains comfortable through the following day, open a little further.
- Test short uncovered periods when you can check it. Gradually extend them if the plant remains upright.
- Remove the dome when it tolerates the intended growing conditions and continues developing. Keep watching after the first successful day.
These are practical observation-based steps. Gradual humidity reduction is the established principle; the precise pace depends on the plant and growing environment. [5]
Drooping after an adjustment? Return to the previous vent position, check the temperature and medium, and try a smaller change once it is stable again. A dry winter living room is a bigger move than an already humid cabinet.
Troubleshooting
- Wet medium, drooping after venting: reduce exposure first. Adding water to an already wet pot will not restore humidity around the leaves.
- Dry medium despite water below: inspect wick contact, where applicable. Moisten the roots appropriately while correcting the connection.
- Spreading soft tissue: separate the plant, inspect its base and roots, and contact the supplier with clear photos. Remove obvious dead debris with clean tools.
- No visible progress: compare weekly photos, check warmth and leave the roots undisturbed if the plant remains stable. Daily unpotting is a very demanding hobby for a tiny plant.
For rinsing gel, distinguishing arrival problems and deciding when to feed or repot, see the complete tissue-culture acclimation guide.
Common myths
- “A foggy dome proves the roots have enough water.” Check the medium separately. Air humidity and root-zone moisture are different parts of the setup.
- “A wick can never make the medium too wet.” Moisture depends on the wick, medium and water arrangement together. Test the root zone rather than assuming the cord controls everything.
- “The dome must stay sealed for a fixed number of days.” Start from the supplier's advice, then use the plant's response to guide small ventilation changes. [5]
- “All misting causes rot.” Commercial propagation can use carefully managed mist or fog. A home spray bottle is a different tool; use it for a clear purpose rather than repeatedly wetting leaves because the lid looks clear. [1]
FAQ
Does a tissue-culture pot need a wick?
No. A suitable growing pot and humidity cover can be managed by careful watering. If you choose a wick system, assemble it correctly and learn how moisture moves in your particular medium.
Can I use the cover after removing the dome?
Yes, while the growing pot still suits the roots. The outer cover remains useful for a coordinated display. Continue checking moisture and emptying runoff where the setup uses a draining nursery pot.
Should I repot as soon as I see roots?
Visible roots are encouraging, not automatically a sign that the pot is too small. Assess how much usable growing space they occupy and whether the plant is stable before making another change.
Ask a question
Which part is puzzling you: watering or opening the dome? Tell us the plant, medium, growing-pot size, vent setting and whether your setup has a wick. Add what changed just before the plant started struggling.
Sources
- University of Florida: Commercial micropropagation of tropical foliage plants.
- University of Florida teaching resource: Acclimatization.
- Iowa State University: Potting media components and handling.
- Variegata Nordica: Tissue-culture acclimation pot, contents and adjustable dome.
- University of Florida: Micropropagation stages.

 The Puddle Method for Alocasia Corms: Rooting Without Rot
 How to Do the Puddle Method for Alocasia Corms
 The Complete Guide to Acclimating Tissue-Culture
Comments