


Clear Pot Covers: Less Algae, Easy Water Checks and a Cleaner Look
TL;DR
A fitted cover can shade your clear reservoir while preserving easy water checks. Measure the actual pot, choose the correct model and keep its viewing window accessible. If green film is already present, clean the accessible reservoir first, then reduce light exposure. Keep the clear growing components for inspections rather than repotting a comfortable plant just to change its appearance.
Why the water turns green
Moist, illuminated surfaces can support algae, particularly where nutrients are available. That includes clear reservoirs under grow lights and constantly damp growing media. Greenhouse guidance recommends shielding nutrient-solution containers from light to help prevent algae formation. [1]
At home, begin by checking where the green growth actually is. A film on the reservoir wall calls for a different cleaning job from a thick surface mat around a fragile plantlet. Excessive algae on growing media can interfere with water penetration; it can also provide food for shore flies and fungus gnats. [2]
You do not need to throw away a plant because the clear container has turned green. Look at the plant and roots as well as the film. If the base is firm and growth is continuing, start with accessible cleaning and reducing light on the reservoir.
Algae or mineral deposits?
- Green slippery film: commonly algae on a damp illuminated surface. It often wipes away from an empty reservoir wall.
- White gritty or crystalline crust: often mineral or fertiliser deposits, especially near an old waterline. These need a water-quality and feeding check as well as cleaning. [3]
- Fuzzy growth around debris: may be mould rather than algae. Remove fallen material and inspect the plant rather than treating every deposit as the same thing.
- Roots looking brown: colour alone does not settle the diagnosis. Check whether roots are firm or soft and collapsing, and whether the plant is declining.
Green reservoir, healthy plant? Start with the container. You can clean a window without renovating the entire house.
Choosing the right cover
A cover should be easy to use every time you water. Before buying, check:
- The exact pot model and outside dimensions. Measure the widest rim, base and height, including any parts that must sit inside the cover.
- Whether it seats properly. A compatible rim should not force the pot into a jammed fit or leave it wobbling.
- Water access. Can you read the level and refill without tipping the plant?
- Insert access. Can you lift the growing insert or clear assembly as intended, without pulling on stems?
- What the selected option includes. Cover-only and complete-setup purchases solve different needs.
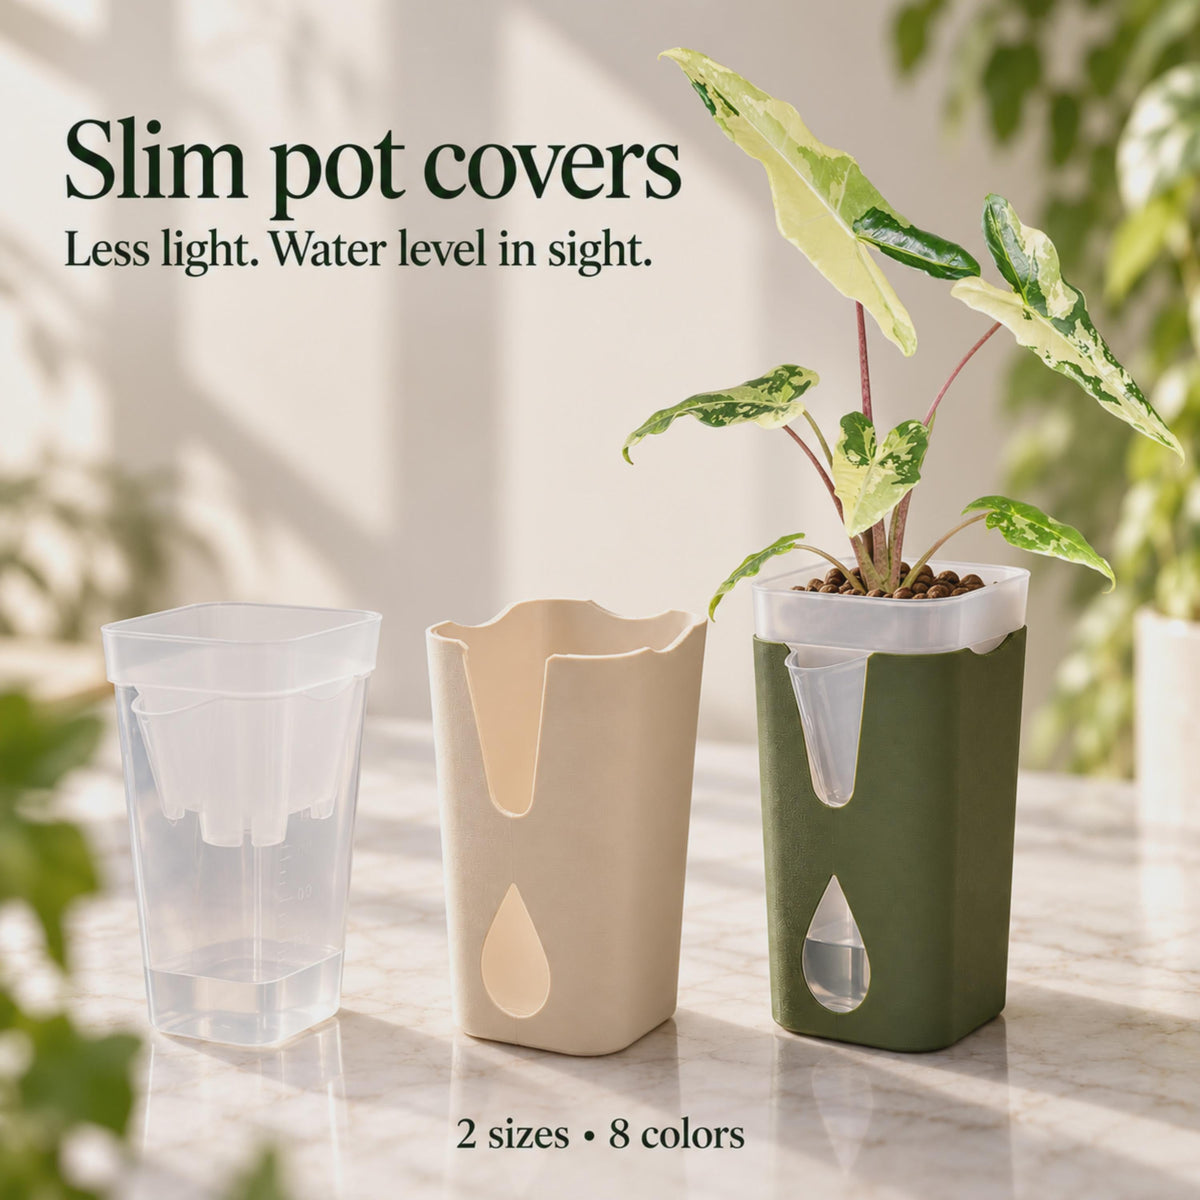
My clear self-watering pot covers come in two sizes for the compatible 2-inch or 2.5-inch pot models, approximately 5.1 or 6.4 cm. These model labels are not universal fit guarantees; compare the listing's size guide with your actual container. You can choose the cover alone or a setup with clear reservoir, planting insert and wick. [4]
The teardrop window keeps the water level visible while the surrounding walls shade much of the reservoir. Choose a colour that works across your shelf, or group colours to identify different batches. [4]
Fitting and water checks
Place the empty cover on a stable surface, then seat the compatible clear pot gently. Turn the window towards the usual viewing position. Check that you can still remove the appropriate components before arranging leaves or supports around it.
Check the level before refilling. Look through the window or lift the clear assembly as needed. Follow the waterline instructions for that particular self-watering pot; the decorative cover itself does not decide the filling level.
If your container is a conventional nursery pot inside a cover, let it drain after watering and empty collected runoff. That is a different arrangement from an intentional self-watering reservoir. Watering guidance recommends discarding excess drainage water rather than leaving a normal growing pot standing in it. [5]
Check the medium as well as the level while learning a new setup. If the reservoir still contains water but the root zone is dry, inspect wick contact. If the reservoir is empty but the medium remains heavily wet, do not refill automatically.
Cleaning green film
- Lift the growing insert carefully. Support it securely. If roots have grown into the reservoir, avoid dragging or scraping them against the rim.
- Discard the old reservoir water. Keep the plant's root zone appropriately moist while working.
- Wipe accessible walls. Use a soft cloth or brush with lukewarm water. Clean removable nonliving parts with mild washing-up liquid if needed, then rinse thoroughly before reassembly.
- Check the wick and openings. Remove debris from accessible slots and replace a deteriorating wick as necessary.
- Refill correctly and refit the cover. Note the date, then compare how quickly the film returns.
Do not scrub living roots to remove every green mark, and do not add washing-up liquid to a planted reservoir. If you cannot access a surface without damaging established roots, clean what is accessible and plan more extensive maintenance when safe.
A cover is particularly convenient here: you can keep the same clear growing components for checks, but reduce their exposure between inspections. It also makes a mixed group of nursery pots look more coordinated without disturbing established plants.
Keeping it manageable
- Shade the reservoir, keep useful light on the leaves. Avoid moving the entire plant into a dark corner just to hide algae.
- Remove fallen leaves and spilled medium. Cleanliness reduces material accumulating in wet spaces. [2]
- Measure fertiliser. Use the appropriate label dose and account for fertiliser already in the medium.
- Check mineral crust separately. For deposits inside the growing medium, see the salt-buildup and flushing guide. Shading does not remove dissolved salts. [3]
- Keep the cover easy to remove. A clean display still needs regular access for water and root checks.
Wipe spills from both cover and furniture. Keep a suitable protective surface underneath where needed, and do not leave moisture trapped against wood. Hand-wash printed parts and avoid high heat; check the care instructions for your selected model.
Common myths
- “Any green film means root rot.” Inspect the roots and plant condition separately. Green growth on a container is not itself proof of decaying roots.
- “An opaque cover keeps every part algae-free forever.” Shading is useful, but the top and viewing openings can still admit light. Combine it with cleaning and sensible maintenance. [1]
- “Clear pots are automatically bad for roots.” Clear components make inspection convenient. Shade them between checks if algae becomes troublesome, while keeping suitable light on the leaves.
- “Just pour peroxide into the reservoir.” Do not improvise a chemical dose around living roots. Accessible cleaning and reduced light exposure are practical first steps.
FAQ
Can I keep checking the water level?
Yes. Position the teardrop window where you can read it, and lift the clear assembly when you need a closer inspection. Easy checks are part of choosing the right fit.
Will a cover fit every pot with the same size label?
No. Nominal sizes do not describe every rim, taper and height. Compare the actual model and dimensions before ordering, or send a photo and measurements if uncertain.
Should I replace the medium because of algae?
Not automatically. Start with the location and extent of the growth, plus root condition. A reservoir-wall film usually does not justify disturbing the entire root system. Dense growth over the medium deserves a closer moisture and maintenance check.
Ask a question
Where is the green growth: reservoir wall, wick or medium surface? Tell us your pot model, substrate and whether it sits under a grow light. For a fit question, include the rim width, base width and height in cm or inches.
Sources
- UMass Extension: Subirrigation systems, including shielding nutrient containers from light.
- UMass Extension: Algae management in greenhouse growing areas.
- University of Maryland: Mineral and fertiliser salt deposits.
- Variegata Nordica: Clear self-watering pot cover, sizing and water-level window.
- University of Maryland: Watering indoor plants.
 Square or Round Pots? Plan a Plant Shelf That Actually Works
 Repotting a Moss-Pole Plant into a Self-Watering Pot
Comments